My first shawl – Spindrift

I have tried to get up the courage to knit a shawl.  One to wrap around my shoulders when a sweater is too warm.  Or around my neck under a coat when a heavy scarf is too bulky.

The Spindrift Shawl by Helen Stewart is the perfect fit.  (Her website is here.)  Crescent shape, a little bit of lace, one skein…what’s not to love? I bought some Zauberball sock yarn earlier in the summer so I cast on for this project sometime in the middle of October.

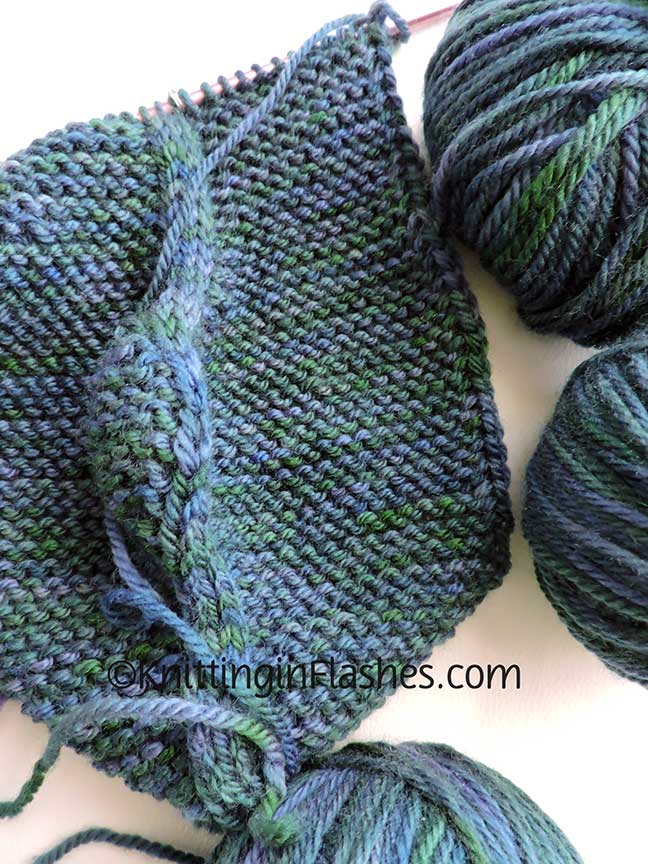
The pattern is great and includes stitch counts at the end of each row. After starting, ripping, and restarting several times, I added a lifeline as I kept losing or dropping a stitch.  You can see those in the picture below. They will be removed once the knitting is completed and before blocking.

The first 4-10 stitches at the beginning and end of each row requires a bit of concentration but after a while it’s easy enough for TV knitting.

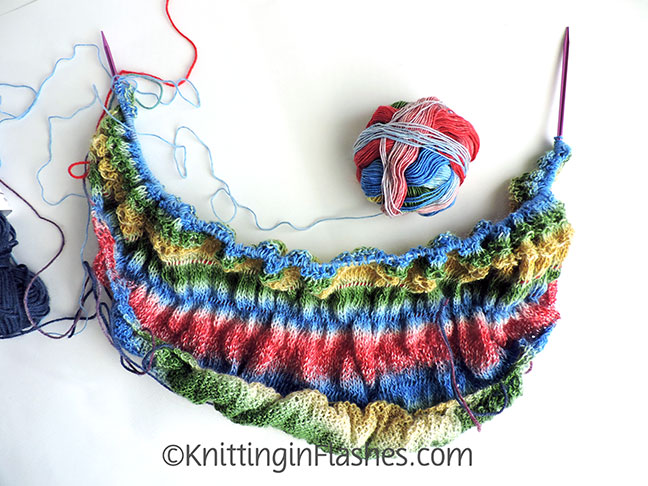
I thought this colorway, Bunte Gasse 2310, was mostly blues, greens and a bit of yellow but it’s got some red in there as well.  It will do but was not what I expected.

It’s taking me about 20 minutes to knit one row as the rows get longer the more stitches I have to knit.  Mr. Aitch and I have a few trips planned and if I can get him to drive, I can knit!

Another overdye

I started with this yarn: Cleckheaton Country 8-ply 100% washable wool in a very beautiful purple color.  But not for a man or at least not the men I know and would knit for.

Enter food coloring, vinegar, squirt bottles and a microwave.

I decided to dye all three of the full skeins that I had because I didn’t think I would use the yarn as it was.  And because I wanted to.

I used basically the same process as I did here.  You can do an internet search for other methods.  After soaking the yarn in a vinegar bath for about 30 minutes, I alternated squirting the dye between shades of blue, shades of green, and a mixture of both. (Sorry no pictures of the process.)  I didn’t want a solid color so I squirted some parts with just the green, some with the blue, and some with a combo of both.

Once completely saturated the yarn was wrapped in plastic, placed in a glass casserole dish and nuked for two minutes, rested for two minutes and so on for about four sessions total.

The yarn was rinsed after it cooled until the water ran clear and colorless.

Here it is after it dried. This reminds me of the ocean…blues, greens and a bit of the purple shows through.


I couldn’t wait to begin another project.  This time it’s the 1898 hat by Kristin Byrnes as posted on the Christmas at Sea|The Seamen’s Church Institute website.  Scroll down on the linked page for many free patterns.  I should be able to knit two hats with the amount of yarn that I overdyed.

Most of my wool yarn is not machine washable but I might need to change that…

Six and seven

I was wrong.  I’ve knit seven pairs of Dorothy’s Slip Stitch Spiral Knit Socks.

Pair #6

Pair #6 using a solid Knit Picks Stroll fingering weight yarn in Peapod plus the Easter Egg dyed yarn and the rest of the red/white/black self-striping yarn.  

I tried to alternate the red/white/black and the peapod yarn to the tip of the toe.  You can see on one of the socks that I ran out before the end of the toe and just used the peapod to finish it.

Love these socks.

SSSK Socks #7 use a new purple self-striping yarn, the rest of the blue self patterning yarn from here and here and here along with the rest of the Easter Egg dyed yarn.  

In fact I ran out of the blue and finished the second sock with some of the Trekking XXL yarn from these socks.

It’s not crucial for the striping to match with this particular pattern but it almost happened.  Unintentionally, of course.

I love these socks, too.

Chairs

Both chairs are finished.  The colors aren’t that true and I can’t seem to get the right adjustments to make them more realistic.  The yellowish-green is more of a chartreuse green and the blues have more depth.

Rita’s chair: Done!  This is now my knitting chair as it sits in the corner.

And here it is in front of the window.  iPad Aunt’s chair resides there now.

iPad Aunt’s chair: Done but not happy with the cushion.  I didn’t wrap the new foam in Dacron before stuffing it into the cover.  It looks too boxy and I need to fix that.  Plus the seat cushion looks too big for the chair but it’s not that way in real life.

Both chairs side-by-side.  You can see that they are very similar but different.  Rita’s chair has a lower part on the bottom front, straight-arm stump, and is a smaller chair.  iPad Aunt’s chair is straight across the bottom front, has a curved arm stump, and is a wider chair.

I tried very hard to get the patterns to match up on both chairs but it was very difficult.  The pattern was 24 inch vertical repeat so I tried not to waste fabric.

I am in the process of redoing the ottoman that matches Rita’s chair but that is on hold for now.  Too many irons in the fire.