Hello darkness

…my old friend.  (Name that tune.)

Well, I was going to show you the pair of seamless slippers I finished Sunday night but the lighting was terrible and I go to work in the dark and return in the dark.

I knit this slipper at the end of October and finally got the mate done.  Pretend there are two slippers here.

slipper

I plan to make two more pair before Christmas.  I’m using acrylic yarn (don’t judge) as that is what I have tons of and it really holds up well for these seamless slippers.  It’s a bit hard on my hands and fingers.

Orange seamless slippers

Orange seamless slippers

I will sew replacement carpet soles on these as well as add pompoms.

Seamless slippers in autumn with soles

Seamless slippers in autumn with soles

A 33-cent Pillow

Last weekend I found some upholstery samples I had from my Mom.  One was a beautiful crewel floral pattern that  I intended to make into a pillow but forgot about it for a few years.  That is until I found it again.

It was simple construction.

pillow-001

The entire piece of fabric was used for the front.  Cost = Free

pillow-pillow

The “wrong” side of another sample was the backing.  The “right” side was blue.  I’m a green person.  Cost = Free

pillow-003 

A zipper was inserted in one of the short sides.  (I purchase zippers in bulk.)  Cost = 33-cents 

pillow-004

I also used a piece of a flat sheet left over from another project for the pillow liner holding the stuffing.  (You can see some of the blue “right” side in the photo below.)   Cost = Free

pillow-005

The stuffing was a freshly laundered old mattress pad folded and rolled to fit inside the liner.  Cost = Free

pillow-007

My 33-cent pillow.

pillow-002

It FITS!!

Remember my failed, successful, and failed attempts for a tablet/iPad cover?  I have succeeded once again!

I decided to follow the KISS rule.  Keep It Simple, Sweetie.

My inspiration came from something I found on Pinterest:

I love all grey colors and the stripe of bright called to me.  I didn’t want to buy any more yarn for this project so I used what I had.  My red didn’t pop as much as I wanted but I like it anyway.  Plus it fits my iPad.

I started with the flap end on straight needles then switched to circular needles to knit the body in the round.  Actually I wanted it in garter stitch since that was how my successful one was knit so I knit a row then purled a row.  I don’t mind purling though I know some people HATE it!  I dislike seaming more than I dislike purling.  When I got to the bottom, I did a 3-needle bind off.  No seams!!

Measurements before felting:

Measurements after felting:

The top flap was pulled and stretched to make it the size I wanted so it is basically the same length before as after.  The cover really is square but the it was at a slight angle when I took the photo so it looks a bit lop-sided.

This could have been felted a bit longer as I can still see the knit rows.  The finished cover is thick and dense.  Maybe it’s the lighter color that shows the rows but I really don’t want to make another one of these (if you know what I mean) since I’ve already made this four times!  Reknitting a failed project isn’t fun.

I haven’t lined this yet and I’m debating on whether or not to add a magnetic snap.  The cover stays closed but I would feel better knowing nothing (like the iPad) would fall out if picked up with the open end down.

A year (almost) in the making

**I’ve had this post written for over a week but waited until this was in the recipient’s hands before I could show it here.**

A year ago I took my first knitting class and started my first felted project: the Garter Stitch Bag.

I finished the bag in time to take on a business trip to Vegas at the end of October 2011.  On the plane I started the same bag for my sister.

Her bag was going to be larger than mine but not as large as the original.  For my sister’s bag I cast on 21 stitches and made the squares 42 rows.  Click here for my Ravelry notes for those interested in my bag.

I worked on her bag when ever I felt like it.  I had no deadline so I could work at my leisure.

It got bigger and bigger and once summer and the hot temperatures arrived, I couldn’t work on it too much.  A wool blanket + 90 degree temperatures = an unhappy and unproductive knitter.

Once the thing was assembled, there was still the i-cord border.  I had forgotten how to do an attached i-cord border but managed to find some great instructions on the purl bee blog site.

The before felting measurements were 22 inches across and 36 inches from front  tip to back tip.  Each square was 5 1/2 inches square.  The post felting measurements were 18 inches across and 29 inches from front tip to back tip.  Each square was 4 inches after felting.  (I think.) I could have felted it more and made it smaller but that was the perfect size for my sister.

Felting was a breeze.

Lining it was not.

I have a few suggestions for those who have made this bag and want to line it.  Fill the bag with towels, yarn, whatever you have.  This will give you a more sturdy surface and 3-D form to work with.  I pinned the lining fabric, right side to the right side of the bag then used a fabric marker to outline the shape.  I made sure to mark which side was which as my bag was not perfectly symmetrical.  Trim the fabric leaving plenty of room for the seams, at least one inch.  Sew on any pocket(s) before sewing the sides and darts.  Trim any bulk and put it in your bag, lining up the top and sides.  Pin the whole thing inside the bag.  Fold the top edges under about an inch and hand-stitch in place.  I did have to notch the lining around the “valley point” at the center.  The last thing was to sew on the leather straps.  My sister wants to put in a magnetic snap so I left the tops section of the lining open.  She’ll have to finish that part herself.

Cascade 220 in Primavera (green) and Jet (charcoal heather).  Size 8 US needles.  Leather straps.  Satin-type lining, matching thread, 1 1/2 inch piece of elastic, and a 7″ zipper.

21,084 stitches.

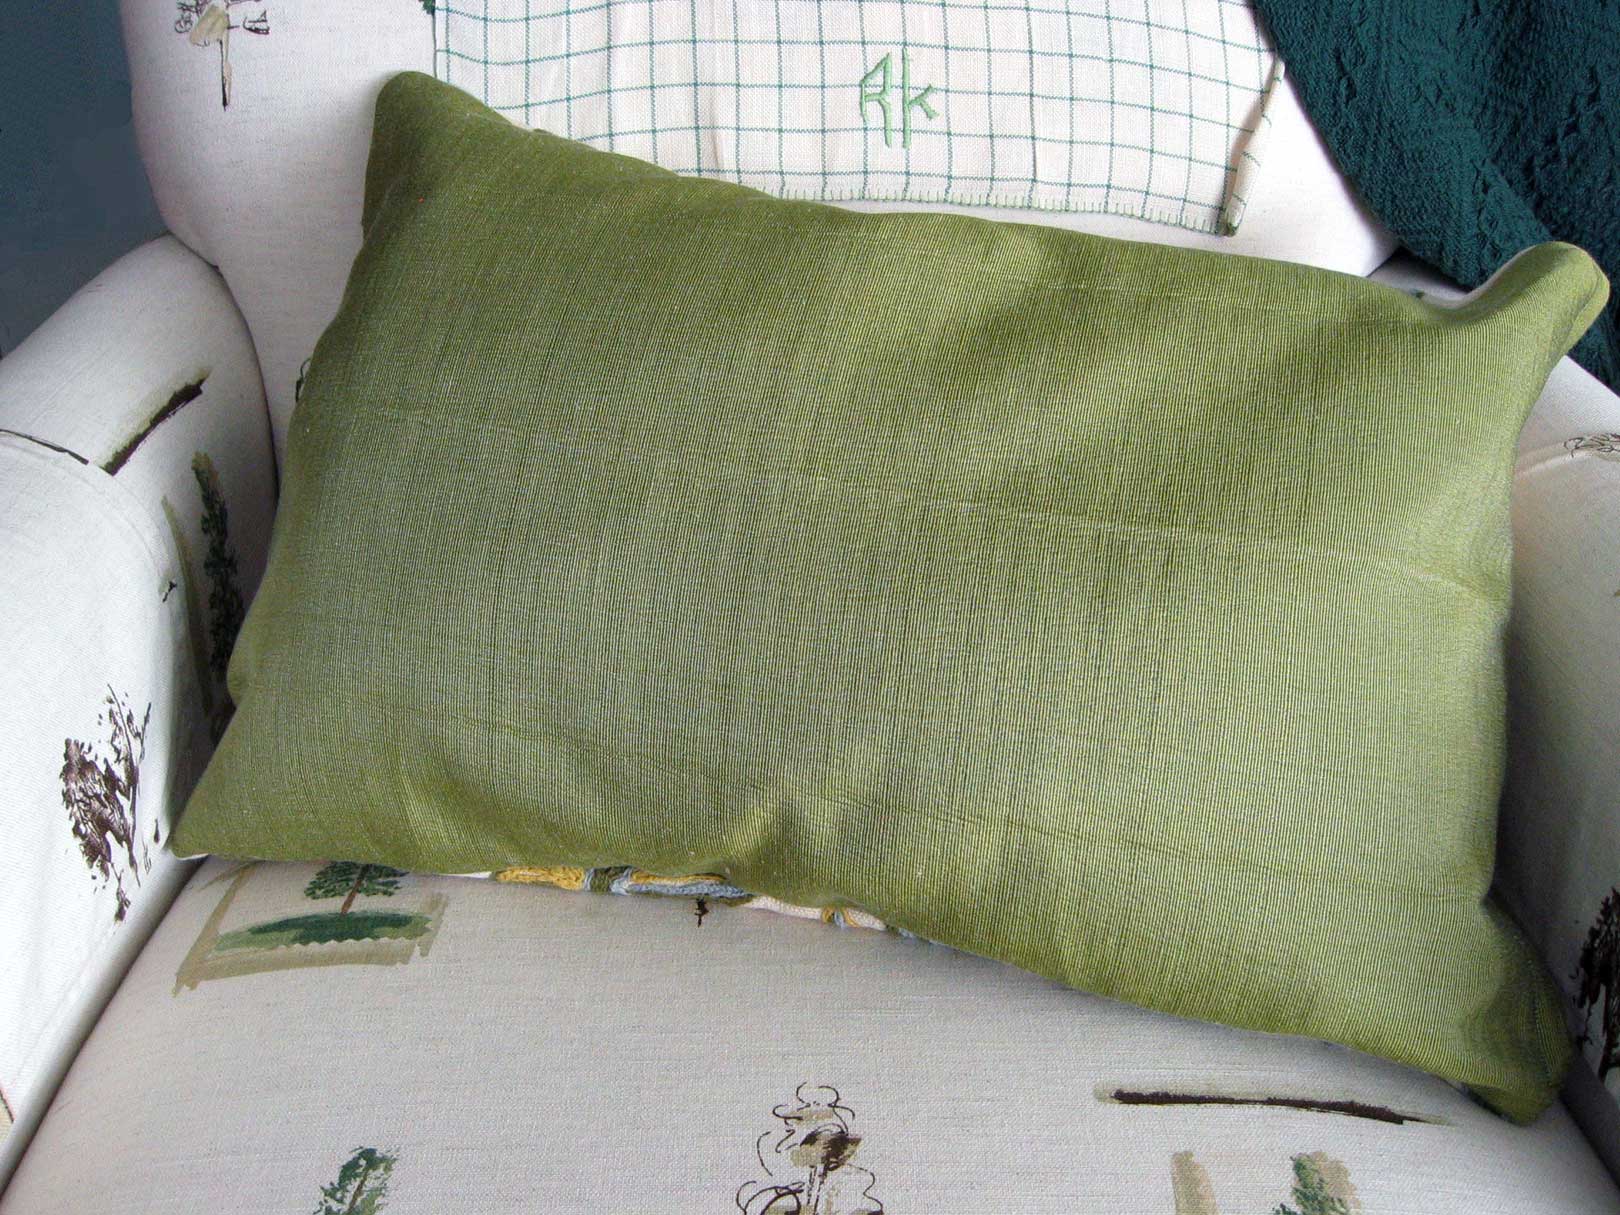
The finished product, inside and out.
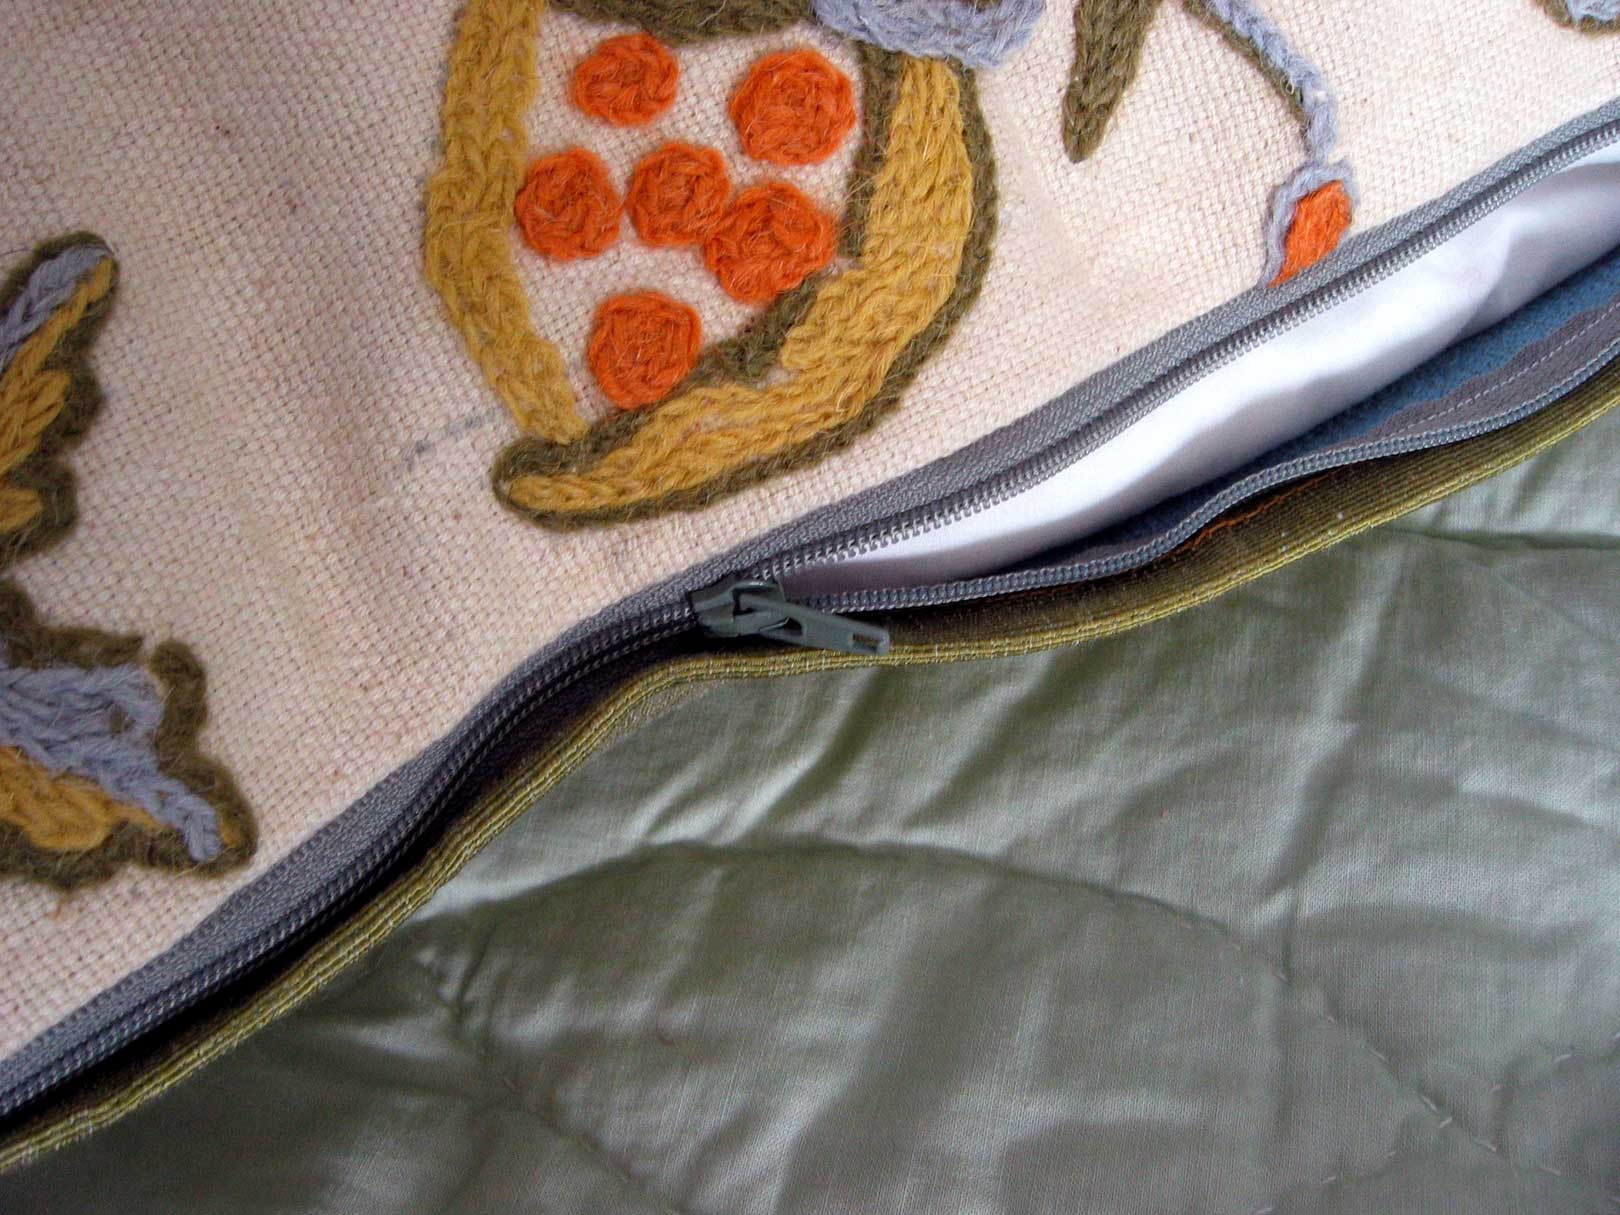
Zippered pocket.

I added a piece of elastic inside and slipped a carabiner in it to attach keys.  I also used iron on interfacing where I thought her magnetic snap would go.