Bloomin’ gusset

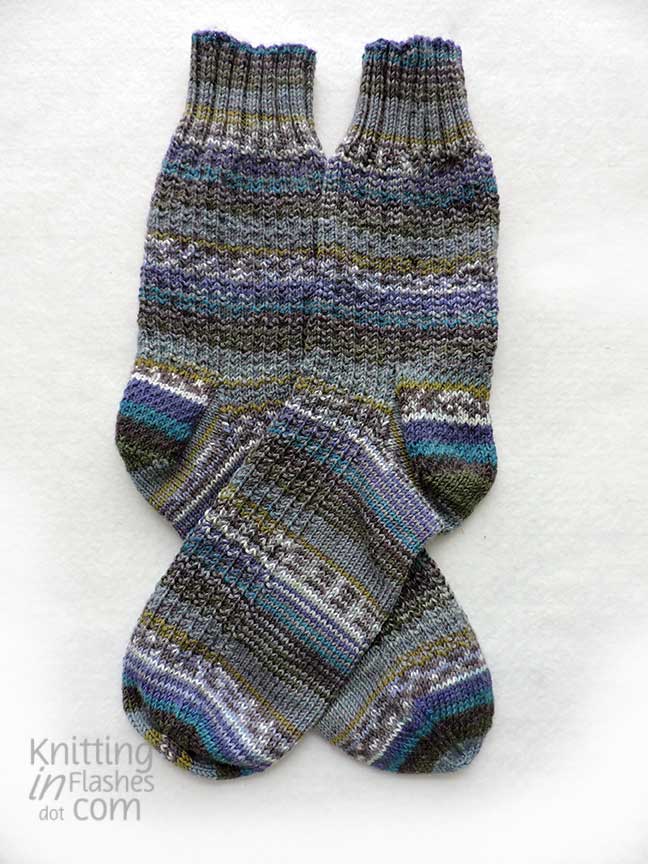
Between the bitterly cold temperatures, thawing frozen water pipes, a trip to the emergency room*, and shoveling eight inches of snow, I’ve got one Bloomin’ sock done, one Bloomin’ sock to go.

I like it but not in love with it.

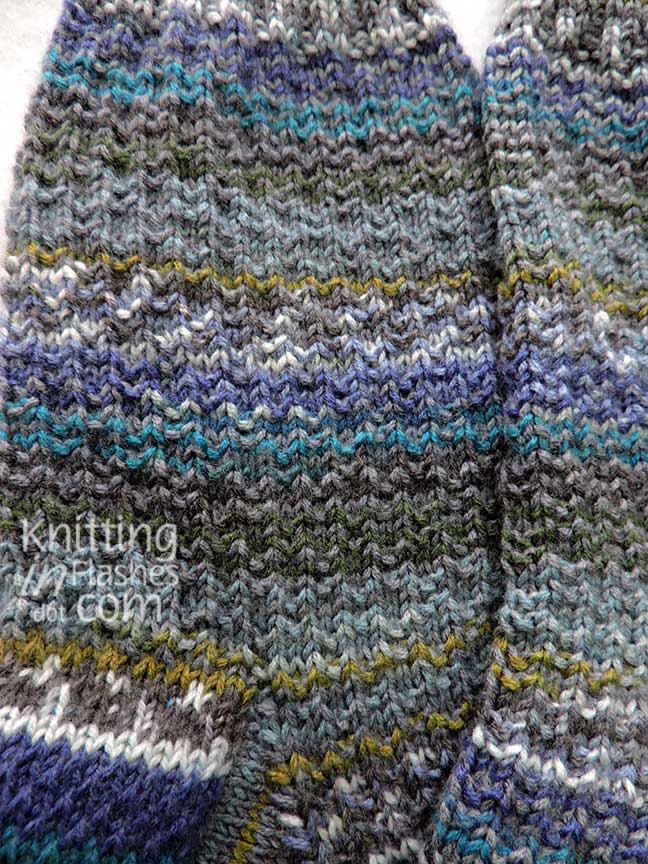
The heel flap is chunky and not caressing the back of my foot as much as I like probably because it’s striped and not ribbed.

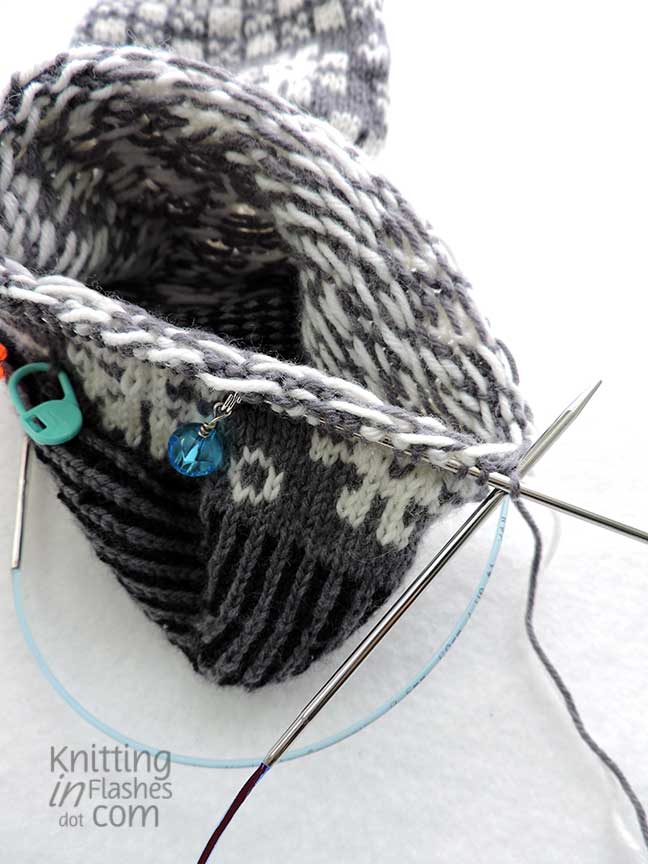
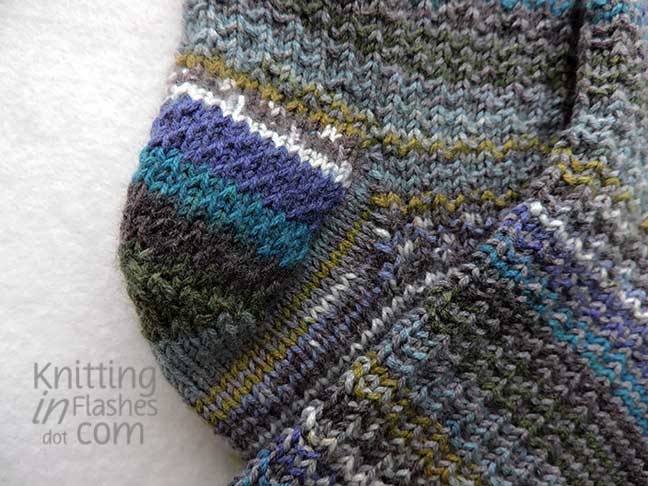
The gusset is so cool though as the pattern goes around the bottom.  This type of gusset is new to me. 

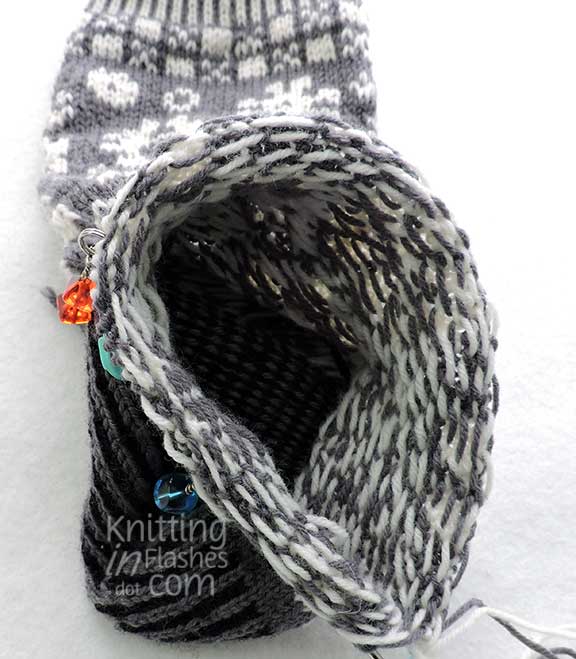
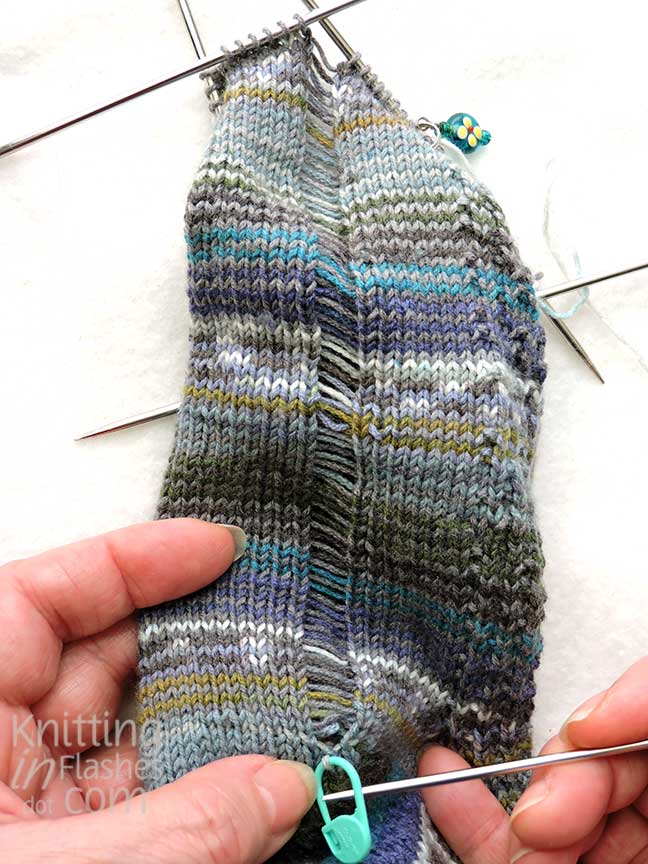
Usually, the gusset is on the side of the heel flap as shown here.  You can see where I picked up the stitches from the heel flap to continue with the foot.  It makes a triangle on the side.  The gusset on these Bloomin’ socks is on the bottom so the pattern flows all around. 

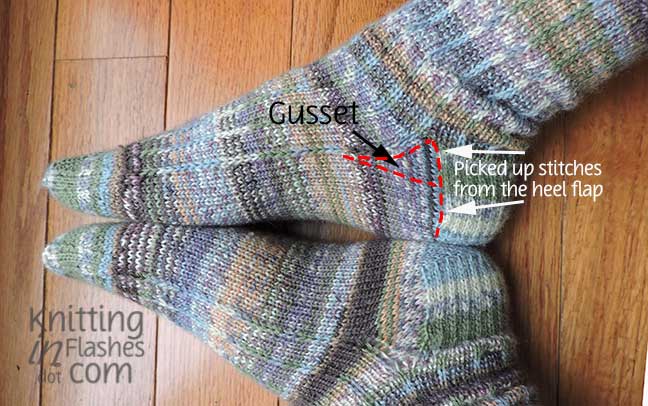
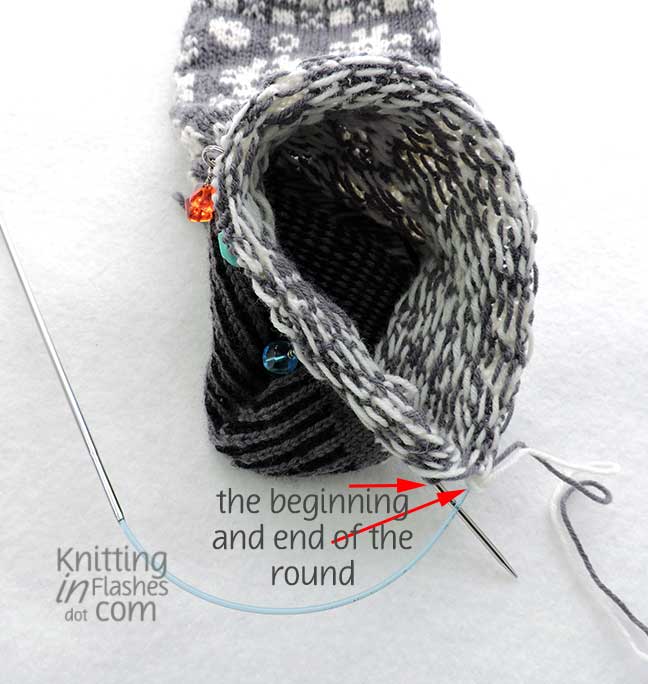
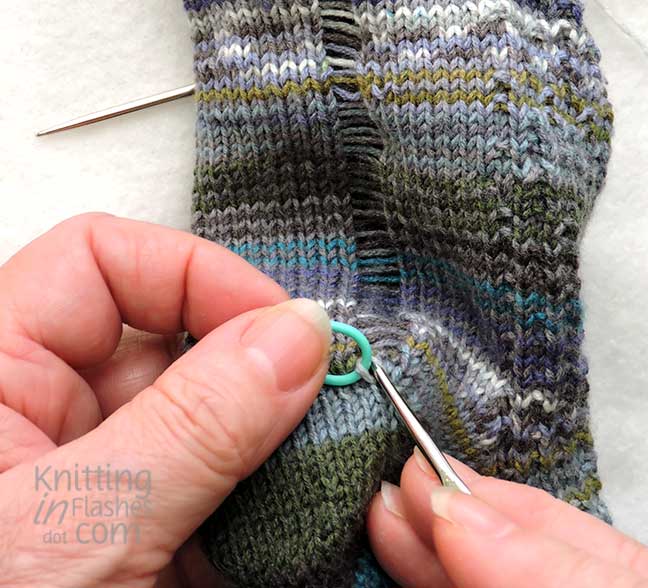
You can also see where I switched from the double-point needles to the circulars.  The decrease stitches are less pronounced once I could knit smoothly over them. 

When on my foot, the heel flap looks bulky and it seems too high on the back of my foot. 

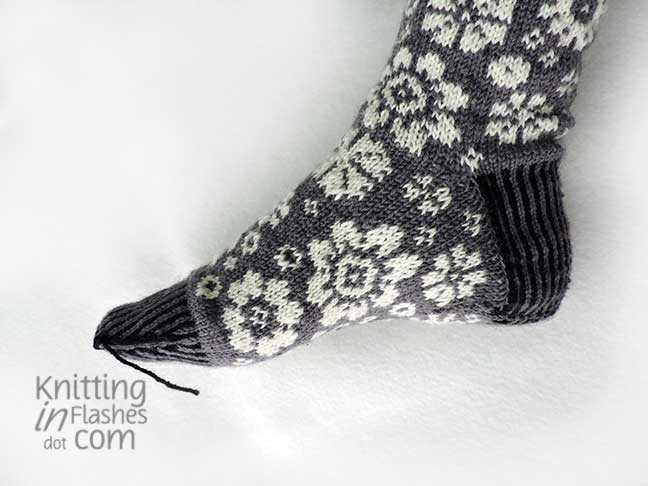
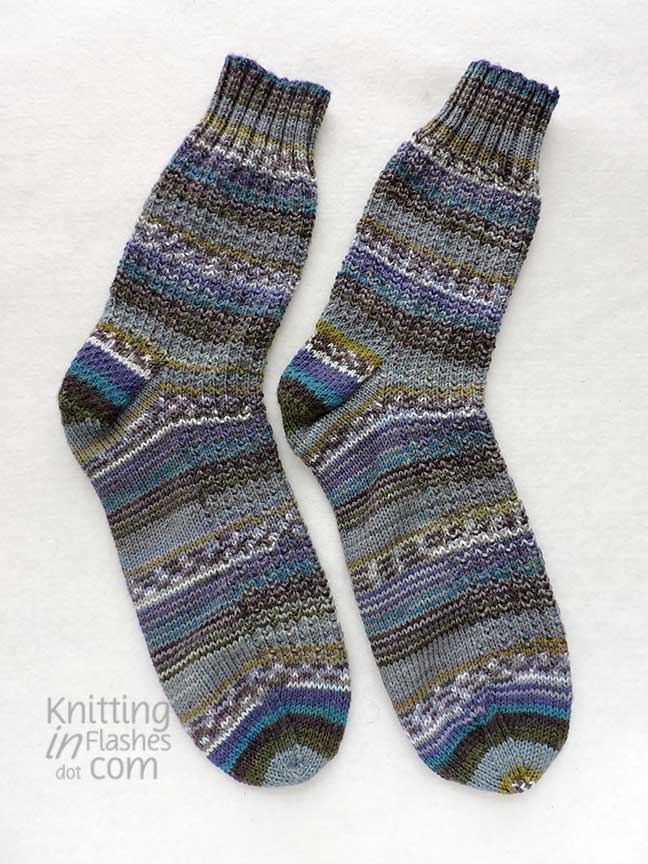
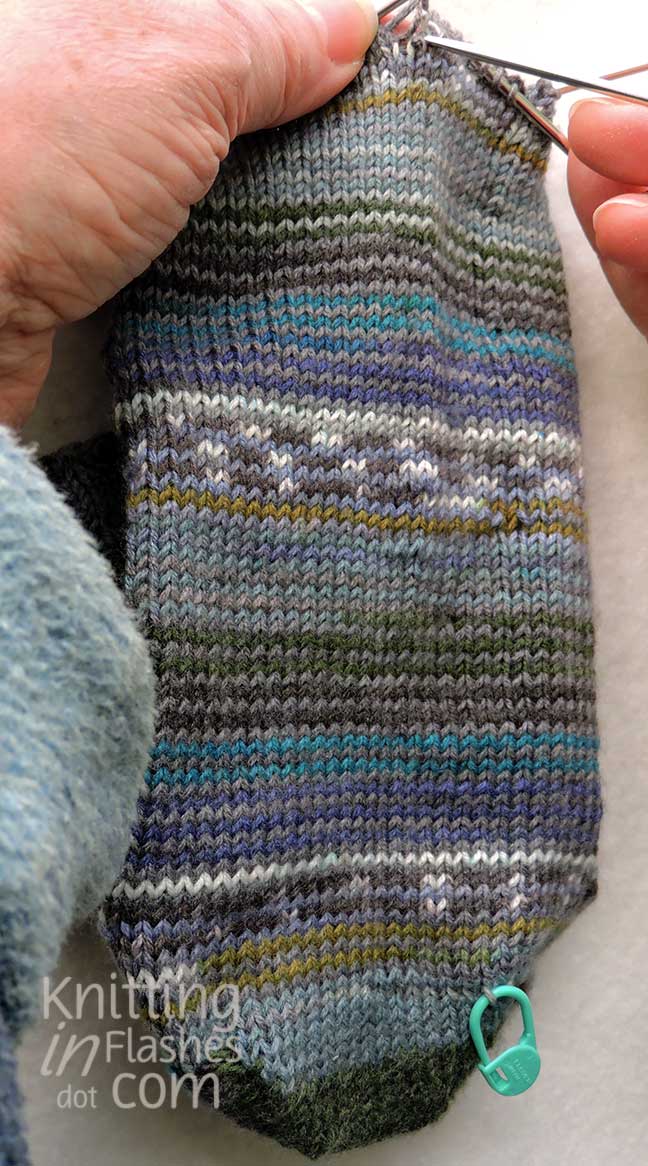
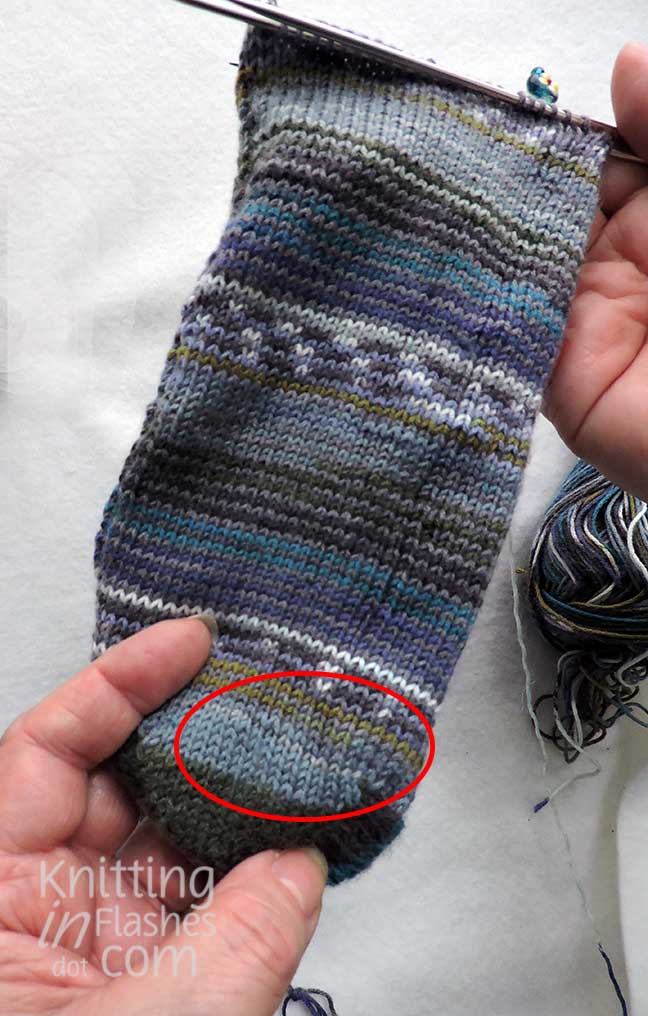
I adjusted the toe shaping as my toes don’t come to a point as the sock does.

I knit six rounds of the stripe before beginning the decreases so I could end the sock sooner and still have enough room for my toes to wiggle.  I finished with the Kitchener stitch.  It looks loose and mangled in the photos.  I wanted to see how I liked the sock before I tightened up everything and made a neatly finished toe. 

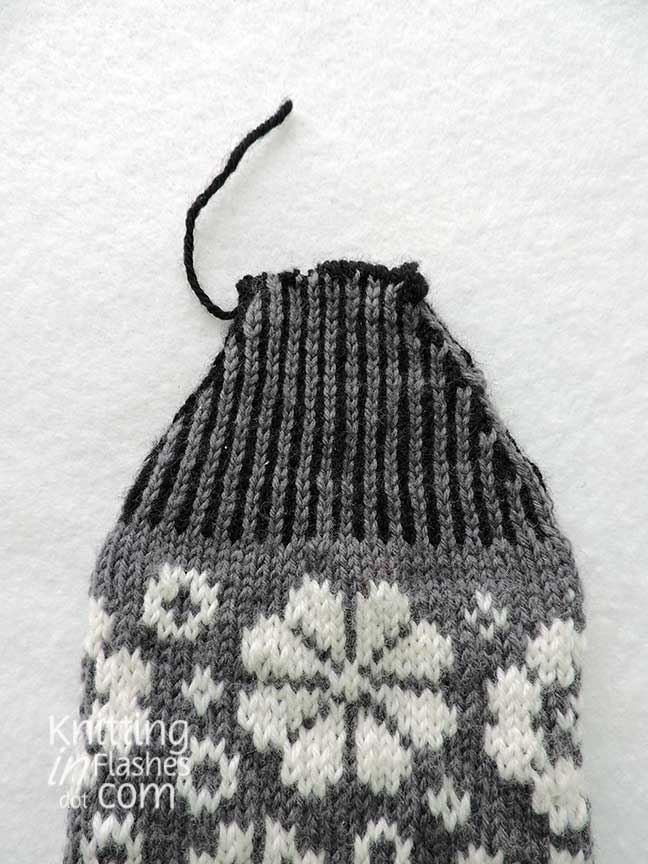
It’s a very thick, two-layer sock and I won’t be able to wear it with any of the shoes or boots that I own (thanks to unwanted water retention), however, I do like it enough to make the second one. 

*Mr. Aitch, not me.  I finally convinced him after a week of discomfort to get the pain in his side and back checked out.  He’s dealing with a kidney stone.  Though not stone free yet, he is feeling somewhat better.

Let me explain

I think I confused many readers with my poor description of too long circular knitting needles in my previous post so this is my attempt to offer an explanation.

Socks, hats, and mittens are basically tubes.  And if you don’t want seams in those items, you knit in-the-round and make a tube.

Some knitters use double-point needles to create this tube and others use circular needles.  Double-point needles (dpns) are pointed on each end.  This allows the knitter to work across one needle, continue to the next needle, and so on in a circle (or spiral). Circular needles are two needle tips connected by a cable.  Sometimes the cable is fixed and sometimes it unscrews from the needle tip to change the cable to another length. There are many videos on the interwebs that will give a better description using both types of needles but I just wanted to show why I went from using dpn to two circular needles and then to a tiny circular needle.

When using dpn and working from one needle to the next, a gap may appear at that join aka a ladder.  Or the yarn is pulled so tight that it puckers.  With circular needles, the piece is knit around and around so there is no definite join at the beginning or end of a needle. You can see the puckered area where I worked from one needle to the next and inadvertently pulled the yarn tighter across the back.  This is a common problem when doing colorwork.  The yarn that is not worked is carried loosely across the back to keep the tension even on the front.  When using dpns, the chance of pulling the yarn tighter at the “corners” is greater than on a straight section.  

Here is the inside of the sock that shows how the unused yarn floats across the worked stitches until it’s needed again. 

I had two cable needles, one 16 inches long and the other 24 inches long.  Both were clearly too long to knit comfortably.  The average foot circumference is less than 16 inches around and the sock would be stretched out of shape.  Mine is approximately 8.5 inches around the ball of my foot.  Even when working with one, then switching to the next, it was not comfortable.

Part of that was due to the length of the actual needle tip.  All of the needles below are US #1.5 (2.5 mm) but the tips (and cables) are different lengths.  The top needle tip is 5-inches long, the middle 3 3/8-inches, and the bottom 2-inches.  

As you could imagine, working around a 9-inch circle with a 5-inch straight needle would be difficult and uncomfortable.  Obviously, it can be done but I knit for pleasure and this was so not pleasurable.

I splurged and bought two 9-inch length circular needles.  One US #1 and one US #1.5.

What a difference this has made!  The stitches are on the tiny red cable and only the points show through the ends.  The sock isn’t stretched out at all.

No more puckers.  No more fiddling with five double-point needles. It was a bit of a learning curve to hold a 2-inch needle, however, not bad at all.  I will have to go back to the dpns once I get to the toe but I’m looking forward to making the second sock and many, many more.  I’m a believer.


Double Dot socks

Thank you for coming up with names for the textured stitch!  I liked them all and went with stgeorgeknits name for the textured stitch: Double Dot Stitch.  Actually, that’s the name I thought of as well.

So the socks are finally finished!  And will be on their way to the recipient soon.  They almost match just like the first pair.

I still have some yarn left.  24 g (approx. 107 yards) of Beach House – the multi blue/teal and 22 g (approx. 98 yards) of the Hari Hari – grey.  (I’m so glad I bought that scale!)  

Two things I did differently were 1.) Twisted German aka Old Norwegian Cast-on and 2.) Eye of Partridge heel.

The cast-on is very stretchy or at least more so than the longtail cast-on that I usually use.  The Eye of Partridge heel is very similar to the “normal” heel flap but I wanted to try it so I did.  It looks more sophisticated.

So there we have it.  The Double Dot Sock.  I anyone is interested, I will be happy to write up the pattern.

No purls or twists

I hope the saga of the twisted stitches and purl bump socks is over.

Removing the purl bump in the middle of the sole was a very easy task.  Untwisting the row of stitches on the heel was not.

I used the same technique for both repairs but I had to rip out the toe shaping to get down to the twisted stitches.  Not really a big deal as it was only 21 rows of decreasing numbers for a total of 892 stitches…but who’s counting, right?  Much better than ripping out the entire foot!

Remember when you got a run in your stockings or tights and it was the end of them?  If you were lucky, you could stop the run from getting bigger by dabbing a bit of nail polish on the end.  Well, I created a run on purpose.  Knitters will understand this but for the rest, I’ll explain why I did this and how to fix it.

  1. Secure the offending stitch, be it a dropped stitch, twisted stitch or the wrong stitch (knit instead of purl or vice versa).
  2. Release the top stitch in the column directly above the offender.  In my case, it was 70 or so rows above.  *Note to self – periodically check knitting for dropped, twisted or the wrong stitch.  Don’t wait until the end to look!
  3. Run, stitch, run!  Help the run along all the way down to the secured stitch.  I was amazed at how much yarn one little stitch used.  Twist that stitch and it will make a tight ridge on the wrong side.
  4. and …
  5. Use a crochet hook, preferably one the matches your needle size…
  6. …and following the stitch pattern, pick up the stitch and reknit it and all the other stitches in that column up to the top.  Fortunately, the stockinette stitch is the easiest to pick up and reknit.  See my fingers poking through the run!?
  7. Secure the stitch onto the tip of the knitting needle.
  8. Repeat until all stitches are secured, accounted for and where they belong.
  9. No more twisted stitches.  They might be a bit tight but once I give them a good soak, they should will (hopefully) relax a bit though I’ve not tried it with this yarn. And the purl bump is gone because I fixed it before I took these pictures.

Even though I had several twisted stitches to do, I only did one column at a time.  Seeing how much yarn one stitch uses, it can be easy to pick up the wrong section of yarn or in the wrong row order if there is more than one stitch worth of yarn. The problem(s) that creates is not worth the perceived time saved.  Trust me.  Experience is a great teacher.

Now all I have to do is reknit the toe and knit the second sock.