Not a knitting project

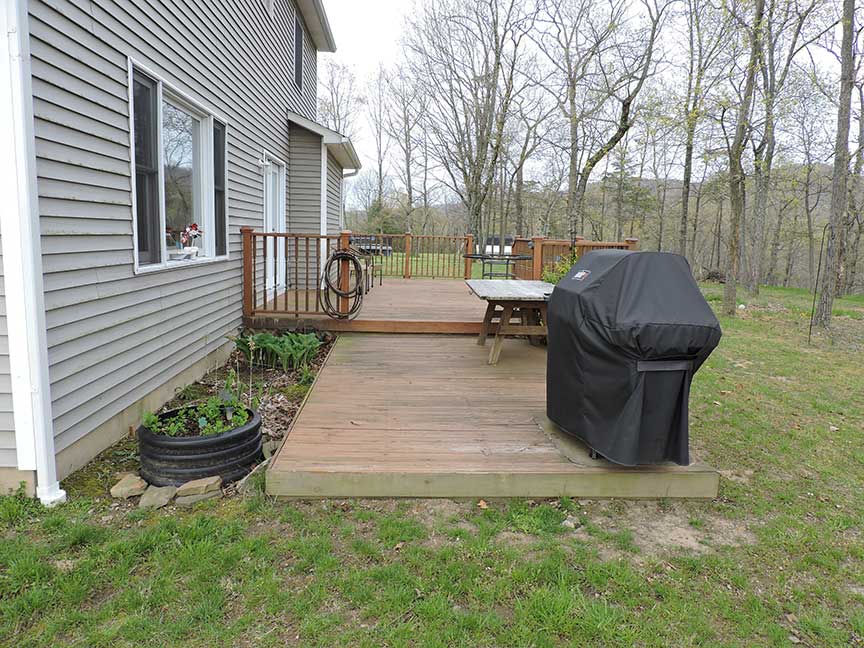
Two years ago we had our old wooden deck replaced with composite decking. We have two levels of deck and the lower section is about 12 x 15 feet. For some reason, I never posted about it. Anyway, the contractor used the existing framing to save on the costs. Unfortunately, the framing wasn’t what it should have been so the decking sagged under the weight of our wooden picnic table and grill that we use on that lower section. Not a lot but enough to be concerned about.

The old wooden deck

I had been thinking of how to fix the sagginess since last summer. So last week, I decided I would beef up the framing on the lower deck before it got too hot out.

New joists are on the left, and two more are needed on the right.

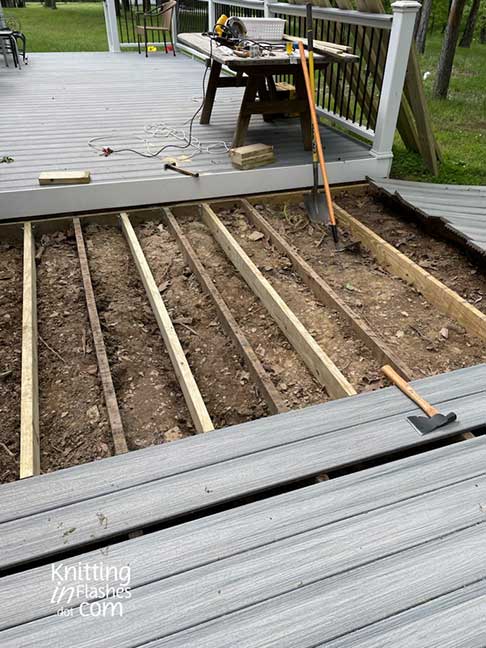
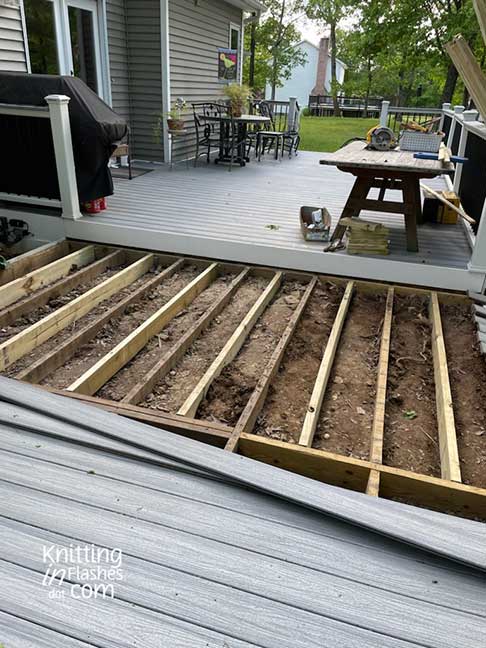
I removed the decking in one afternoon. Then I added joist hangers and new 2 x 6 lumber in between the existing joists so the support would be every 12 inches instead of every 24 inches.

Section 1 finished. That’s a root on the right, not a snake!
Section 2 joists finished!

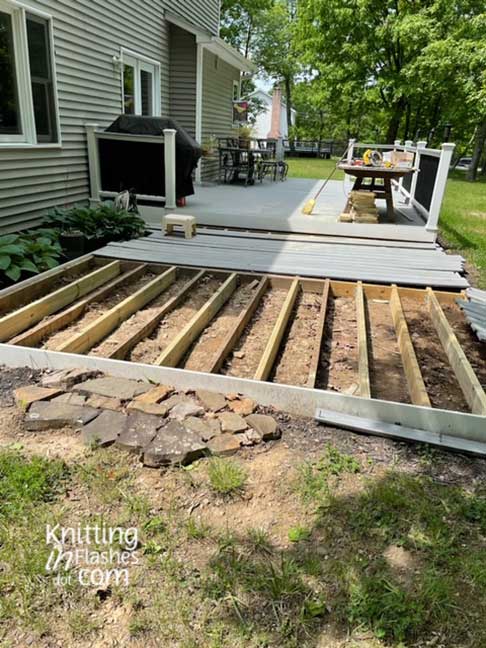
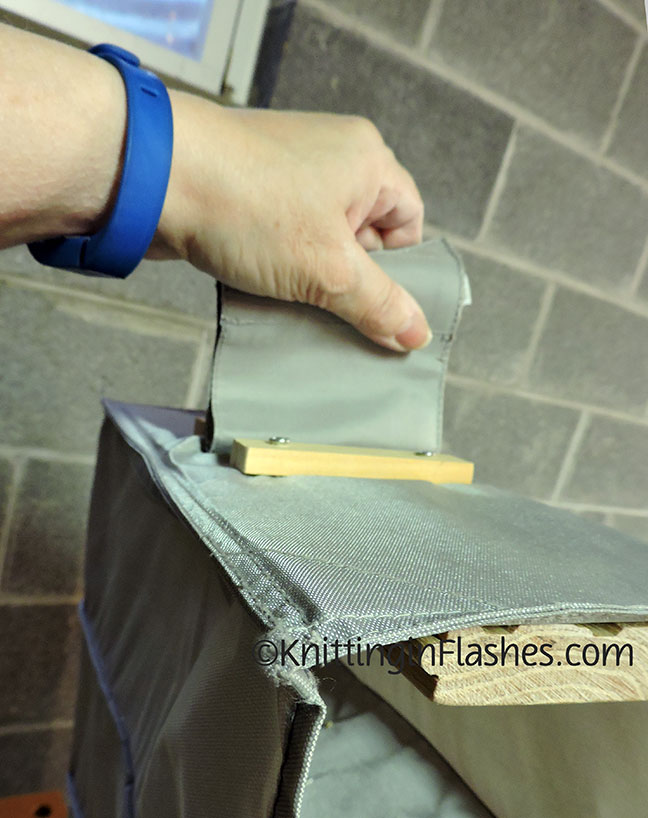
The part that took the longest was putting the decking back on. There are special (and of course pricy) brackets that fit into the grooves on the sides of the decking boards so no screws or nails are visible on the top. It’s really neat and clean-looking. The issue was getting the brackets (I added more) and the grooves to line up so the boards would just slide in.

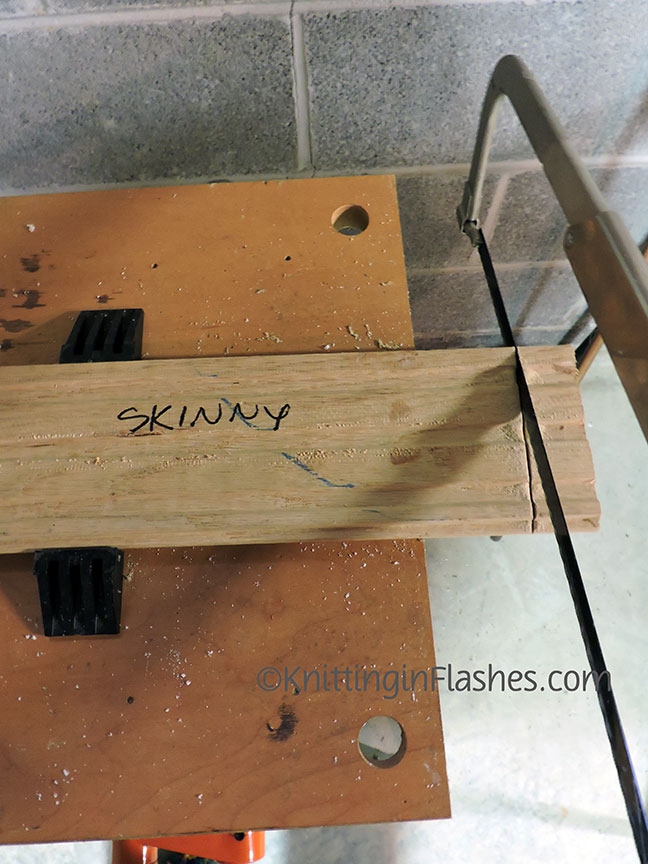
By the time I got to the last board, I discovered that it was too wide. Not getting the boards snugged up as tightly as the original installation was the problem. A fraction of an inch over the span of 30 boards added up. I managed to rip the last board down and get it in place.

I think this will hold an elephant!

I had some uneven stones as a kind of step off the one side but will find* someone (who knows what they are doing) to redo that area with some leftover pavers from another project to make a transition from the grass to the deck.

All in all, this took twice as long to do as I originally planned thought. Plus I was still recovering from that nasty virus. More clean-up is needed but the heavy labor part for me is done…for now.

*I don’t know what it’s like in your neck of the woods but trying to find someone, anyone around here to do work is next to impossible. I know most of the projects/jobs aren’t huge but does no one need money or to work anymore?

Patti

I fixed this and that

Mr. Aitch’s leaf blower/vacuum fell over in the garage earlier this year.  He didn’t realize it at the time but the knob handle cracked.  Later when I was vacuuming some leaves and after laying the blower on the ground, I grabbed the handle to pick it up and the knob section came off in my hand.

I tried to glue it but that didn’t work.

I thought about Sugru ( which looks awesome) but I didn’t want any flexibility on the handle.

Enter Oatey Fix-it Stick™ Epoxy Putty*.

When the outer light grey material mixes with the darker grey core, it is pliable for about 5-10  minutes before it begins to harden.

I cut off about an inch and mixed it together in my hands (wearing disposable gloves) until it was a uniform color.  Then I set the knob handle back in place and squished the soft putty around the broken sections bonding the two pieces together.

Voila!  The Fix-it Stick™ hardens quickly and securely. It repairs leaks, holes or cracks in a wide range of materials. It is lightweight and is as strong as (if not stronger) than the original!Fix#2… We have an original Mr. Coffee Iced Tea Pot™ from the1980s.  It still works great, however……the handle cracked 20-some years ago.

I never replaced the pitcher but continued to use it with the tea maker.  It worked but we just couldn’t hold it by the handle so we just transferred the iced tea to a different pitcher.

Oatey Fix-it Stick™ to the rescue again.

This does not come in contact with any food or drink and works perfectly for this type of repair. Though not necessary I still transfer my iced tea to another pitcher that isn’t as tall and fits in our refrigerator better.

*I am not affiliated, associated, authorized, endorsed by, or in any way officially connected with Oatey. I received no compensation for this product.  I use it, like it and thought you might as well.


Hey

I’m still here.  I haven’t knit one stitch since Monday.  Mr. Aitch’s niece is expecting in July and the baby shower is next month so I’ve got a pair of baby booties on the needles.

Anyway, I’ve been working in our walk-in closet this week making a double hang section for clothes where a single hang section is now.  No eyes have been poked out nor fingers lost so it’s a win-win so far.  Sorry, no work-in-progress pics of anything.  Maybe next week.

Have a great weekend!

An easy fix

In my previous post you saw the broken top of a hanging shoe holder. This is how I repaired it.

101-shoe-closet

All the materials were found around the house.  And by house, I mean the basement.  Didn’t have to but anything for this fix.

We (and I mean me) saved pieces of the hardwood flooring we had installed in the last decade.  Those pieces have come in handy over the years.  Some pieces are damaged such as the tongue was split or the piece was too skinny or narrow on one end but were saved anyway.  So I dug through the dwindling pile and found two pieces that were almost the correct length of the shoe holder.

102-shoe-closet

One piece was about an inch too long so I cut it with a hack saw.  We (and I mean me) need a circular saw and a chop saw but that’s beside the point.  Gotta use what’s available, right?  I sanded the rough edges.  Didn’t want anyone to get cut or a splinter in their hands/fingers once it was in place.  The finished side of the flooring is facing down.

I found some small pieces of pine also left over from another project for the cross-pieces and cut them to the width of the shoe holder.

103-shoe-closet

Drilled holes through the cross-pieces to prevent the wood from splitting, down through the broken plastic and into the piece of flooring.  The cross-pieces were close to the hanger part as that would get the most pull when hanging.

104-shoe-closet

Since I only had ten screws, I just used one cross-piece on each side of the hanger.  I might get more screws for more cross pieces for each end to make it more secure.

105-shoe-closet

Ta-da!

106-shoe-closet

The finished repair.  Not pretty but it works.

107-shoe-closet