Box Bags strike again

For the annual (but optional) gift giving this past Christmas, I made more Box Bags.

I love making these things but as usual they got put on the back burner since I had to finish two quilts by Christmas.

Box-bags-for-office-014

You will have to imagine the finished product as I managed to capture a photo of the fabric but not the actual bags.

2/5 down 3/5 to go

Happy Belated New Year!

I survived the last three Holidays!  Thanksgiving (US), Christmas, and New Year’s!  I gained Bluetooth headphones and only five pounds.  Fortunately I lost nine pounds before all the crazy eating and drinking of all the calorie-rich food and drink.  That is a plus for me.

Do you have a bucket list?  I do.  And I don’t.  One of the things on this nonexistent bucket list was to make a quilt.  Well, I made two quilts but still need to make three more.  One for each of my grandchildren.  That lifetime goal was made when I was 35 years old.  I’m a lot older than that now but having a bucket list was also nonexistent way back then.

So here are my two quilts.  The first quilts I’ve ever made.  I learned a lot from this experience…meaning I’ve made mistakes.

I posted photos of this project in 2013 and now I have finally finished them.

Without further ado…

Zs-quilt-front

I used the stack and slash or whack technique with eight different fabrics plus a neutral ivory solid and a sprinkling of khaki.

Es-quilt-front

I wanted the quilts to be a little bit longer so I added three rows of leftovers.

Close-up

The backs…

Zs-quilt-back

The backs involved the first letter of each recipient plus some leftover fabrics to coordinate with the binding.

Es-quilt-back

Close-ups of the backs.

Zs-quilt-back-closeup

Es-quilt-close-up

My sewing machine does some lettering/monograming so I made machine stitched labels sewn to the lower right side on the quilt backs.  In case you wondered, I am “Nona”.

Label

Straight line quilting, well, as straight as I could do it.

On the beds.

Zs-quilt-bed

Es-quilt-bed

So two down, three to go.

OCD vs. Perfectionism Part 2

I asked Mr. OCD to help me with an office chair I recovered.

Here’s the chair:

Desk-chair-1-before

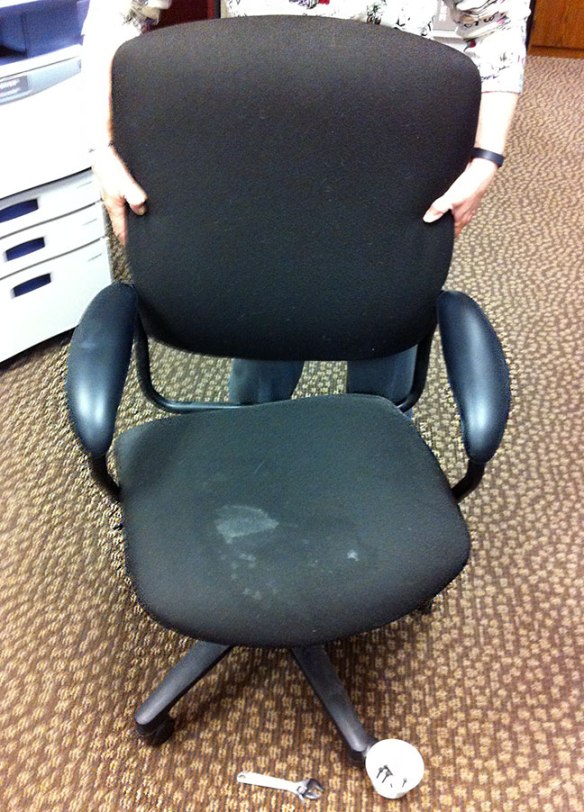
Yeah.  It looks disgusting.  Someone (not me) spilled coffee on the seat and the stain never came out.

It belongs to the receptionist even though we don’t have a receptionist. Glad we got that cleared up.

Anyway, I found some great upholstery fabric on clearance at Joann Fabrics and decided to take on this project.

I started taking the chair apart but one of the other guys in the office thought he should get in on the act and helped.  Whatever.  It’s a man thing.

Desk-chair-2-before

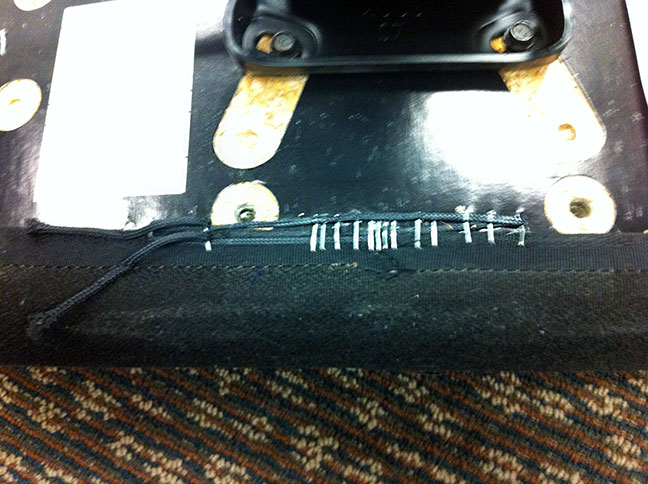
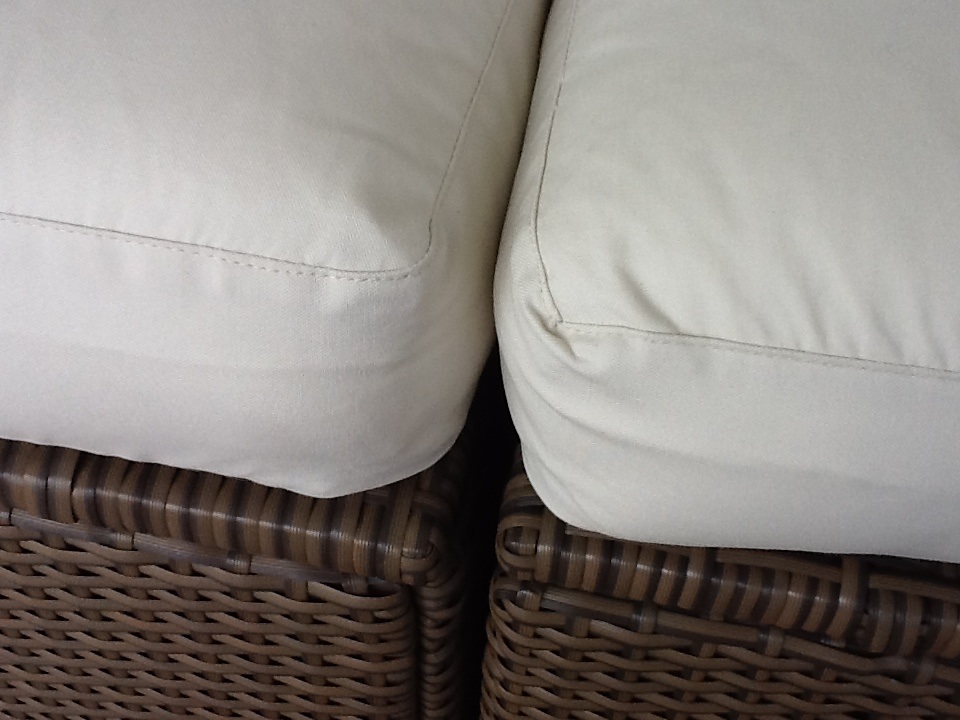
The original cover from the chair had this cool binding with a cord running through it which was sewn around the edge.  When the cord was pulled, the fabric cinched up around the frame so fewer staples were needed.

Desk-chair-1.2-before

I took the old fabric from the seat and chair back home to use as a pattern for the new cover. I ripped off the binding stuff as it was still good and sewed it on the new fabric to make it easier to fit the frame when I got to that part.  It was a tight fit for sure.  There didn’t seem to be a lot of extra fabric to wrap around the chair back so Mr. OCD and I pulled and pulled and pulled.  And stapled where we thought it needed it.  Only I had the wrong staples for my staple gun.

Mr. OCD said it wasn’t worth it and was ready to chuck the chair into the dumpster.  I wasn’t giving up.

To humor me Mr. OCD brought his staple gun and staples in when he came back from lunch.

I was determined to get this chair recovered.  After more pulling and stapling and hammering and tugging, we finally got the new cover secured and the back panel on.  It didn’t look good.  Some of the staples were showing and I wasn’t satisfied.  Mr. OCD was because that part was done.

But I jumped the gun.  I realized that we had to reattach the arms before we put the back panel on.  Mr. OCD was ready to pitch the chair again.  We wrestled the back panel off and I pulled out the offending staples because they really bothered me.  It just wasn’t right.

I had two pairs of pliers to help grasp the fabric as I tugged as tightly as I could and told Mr. OCD to staple farther into the chair so the staples wouldn’t show this time.  We got the arms bolted on and put the back panel on.  This time all the staples were hidden.

It wasn’t perfect but it was right enough.

The seat cover was a piece of cake.  I got the cover on and he and I both pulled the cord to cinch up the fabric over the chair seat frame.  I had to wiggle and scooch and maneuver the fabric to try to match the pattern from the upper part to the seat as best I could.   Mr. OCD stapled the fabric and cord to the bottom of the seat.

We reattached the base and admired our handiwork.

But not for very long.

The assistant director liked the chair so much more than the one he was using so he procured it for himself.

Desk-chair-3-after

The chair wasn’t perfect but it was right enough.  And worth doing.

June update

Between repairing nine window screens, doctor appointments, hospital tests, a visiting grandchild, a flooded basement, work, and life in general, I finished a couple of things. Nothing knitting related but still creative or challenging.

In a previous post I showed you some pictures of our front porch.   I don’t know if you noticed the screen on the bay window. Probably not. Well, it was torn at the bottom. An over zealous power washer was, um, over zealous and several screens were damaged.  We don’t take the screens out of our windows in the winter so twenty year-old fiberglass mesh screens are fragile.

I learned how to replace window screens. YouTube is wonderful. I could pick all the components locals except for the plunger pins that hold the screen into the window frame.  I found a place on-line and ordered enough to replace all of them in our windows should the need arise.  Good thing I did as I ended up having to replace some in our other windows before the job was finished.

image

I also decided early on that ivory cushions on an outside sofa was not a good idea. I purchased some fabric on-line and made new cushions.

image

I plan on making new pillows as well but thought I’d give you a sneak peek of my progress so far.

image

I even did the top stitching like the original cushions.

image

image

They seem a bit bright and busy but anything would after plain ivory, right?