A yarn swift is a device that holds a hank of yarn fairly taut so one can wind it into a ball without creating a hot mess of tangles and knots. Usually I use my knees, an upside down patio table or Mr. Aitch’s arms as my yarn swift. Having a rotating mechanism is much easier.
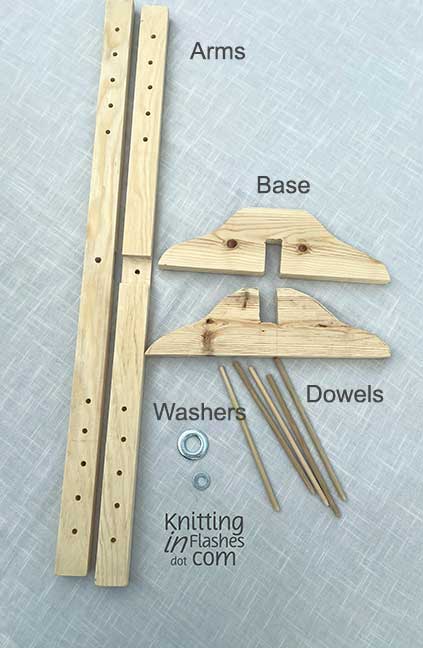
Here are the parts of my swift.


Two arms 30-inches long that are notched in the center to fit together to make a cross. One hole is drilled into the center to hold the arms onto the base. Each arm has holes drilled partway through to hold the dowels that will eventually hold the yarn. A two-piece base. Two washers though one would work to make the arms rotate easily. Five 6-7 inch dowel rods.
The two base pieces notch together.
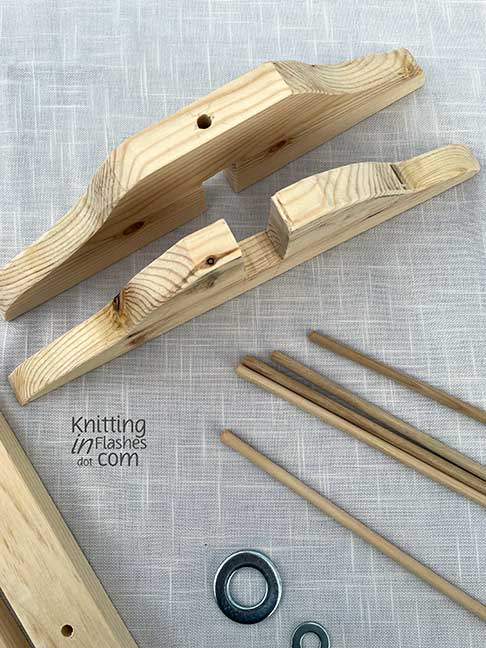
Next the washer(s), and the longer dowel.
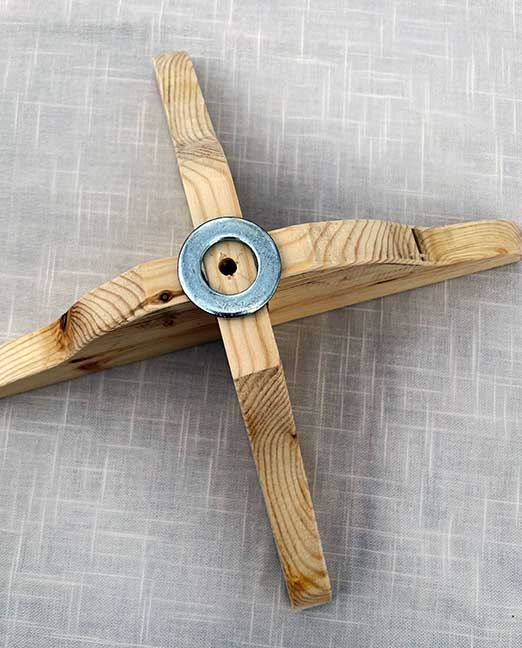
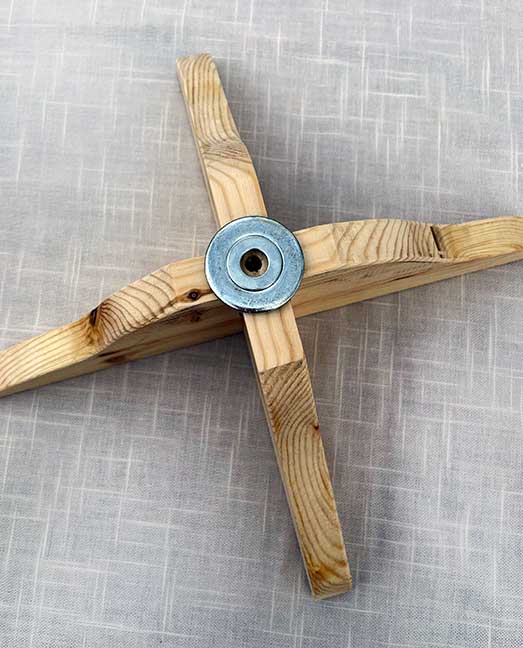

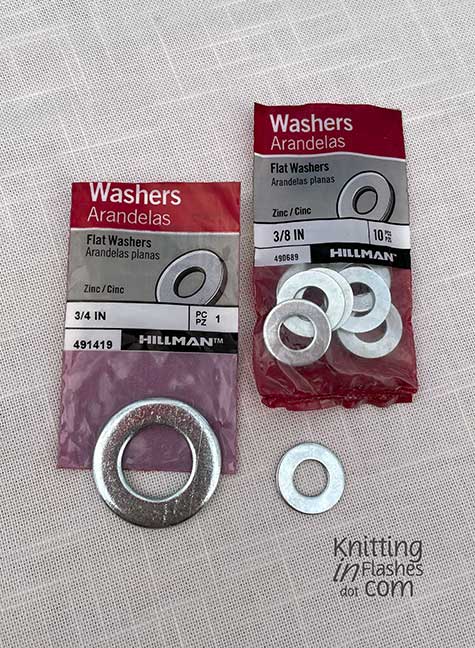
These are the washers I used. I couldn’t find a large one with a hole that would fit my dowel. The smaller one fits inside the larger one perfectly so it won’t wobble when the arms turn.
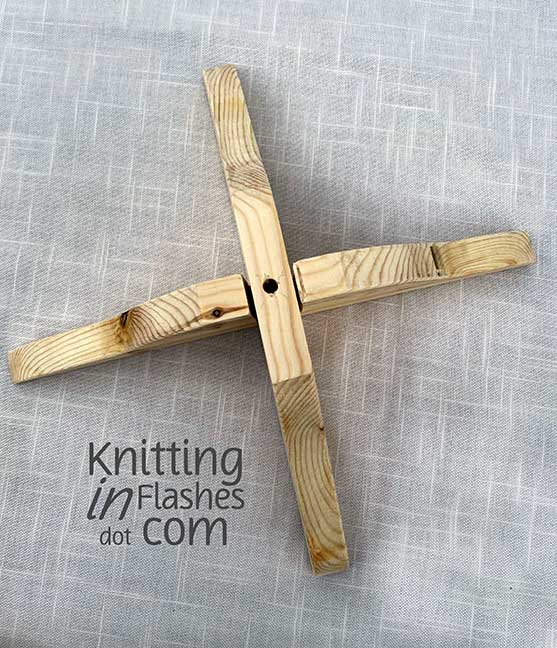
The two arms lap together in the middle to make a cross and slide over the center dowel.


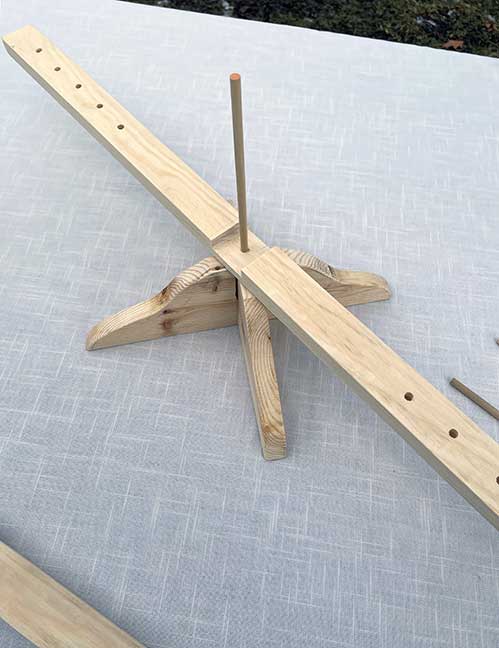

The four other dowels are pushed into the holes, one on each arm, to correspond with the size of the yarn hank.

I ground the ends of the dowels just a bit with a pencil sharpener so they would go into the holes easier.
Voila! I spent $10.68 on the wood and washers. After several hours of cutting, repeatedly plugging and unplugging my tools, and assembling, I got myself a yarn swift that when not in use, takes up very little space.
I had a short video of the swift in action but I couldn’t get it to load properly.
My next sewing project will be to make a drawstring bag to hold all the pieces.
Now if I had a woodworking shop and all the necessary tools, this would have looked more professional. In my dreams a band saw, drill press, table saw, chisel, and a router would be awesome. Instead I used a jigsaw, drill, coping saw, hack saw, Dremel tool, screwdriver, utility knife and sandpaper.
Here are the two videos I watched for the dimensions and demonstration from Cozy Corner Crochet.
If you want more details, just leave a comment.
Now, if I can make this, you can too!

Discover more from Knitting In Flashes
Subscribe to get the latest posts sent to your email.


STUPENDOUS! Great job and what a wonderful functional piece to make your yarn-time (and R’s) better!
LikeLiked by 1 person
I am gifting myself a tool chest on wheels with drawers for the tools, a wooden top,and power strip so I have a better working area.
LikeLike
you can make me one! 🙂 Actually, I have a friend who is very good with this kind of thing, so I may just share this with him and see what he comes up with. Thank you!
LikeLiked by 1 person
Whew! Glad you like it. If you have the right tools, the job is easier.
LikeLiked by 1 person
That’s pretty darn cool!!
LikeLiked by 1 person
Thank you!
LikeLiked by 1 person
Make me want to start spinning, but I gotta finish some knitting things that are due Wed first!!! ugh!
LikeLike
Well, I have most of those tools, but I also have a couple of swifts, so I don’t need more!
LikeLiked by 1 person
I do prefer your style of swift but I won a beautiful umbrella swift years ago so I keep using it. Congratulations on making your own!!!
LikeLiked by 1 person
Thank you. I haven’t needed to use it yet but soon!
LikeLiked by 1 person
Pingback: Things I want to do this year | Knitting In Flashes